Simple Training for Functional Walking & Better Balance
Walking is an essential movement capability for independent living — both as we age but also right now, no matter what stage of life we’re in. As our modern culture becomes more and more sedentary, we’re less likely to notice when walking becomes difficult because we just don’t do it as much as our predecessors. Previous generations had to walk to get their basic needs met. Have you noticed resistance to parking farther away from an entrance? When you do walk, does something start to ache? Are you slower than you want to be?
If you answered no, great! These exercises are still for you. And if you answered yes, it’s not too late to make changes that will keep you happier and healthier — and able to do the things you want to do — for longer.
At it’s most basic, walking is falling from one foot to another. This movement is accomplished by a rotation of the head of the femur within the hip joint. To get from the back foot to the front foot, we have to momentarily stand on just one leg, requiring stability and balance. When the falling motion and the alternating of front and back leg becomes unstable, we experience greater wear on our less mobile joints, such as the knees and we are at greater risk of falling.
While there are a lot of muscles, tendons and ligaments at play in supporting stable movement, we can focus on a couple of major players in our training. In the front of the body, a major actor in lifting our foot away from the ground so that we can step forward is the iliopsoas. The March exercise trains the iliopsoas and the core while the Kickback exercise trains the back of the hip and leg, focusing on the gluteal group. It is the back of the hip and leg that pushes our weight forward onto the front leg when moving forward. Once the weight is established on the front foot, the back foot swings forward through the March position, as we balance on the forward leg, then lowers down to become the front foot and the cycle begins on the other side.
Becoming comfortable with these two movements by developing coordination, strength and posture improves the gait cycle, making walking more comfortable and sustainable for a longer period of time.
Training each exercise individually at the appropriate level is the starting point for everyone. When we are comfortable with each movement, we can link them together to mimic the walking gait in slow motion, staying in place.
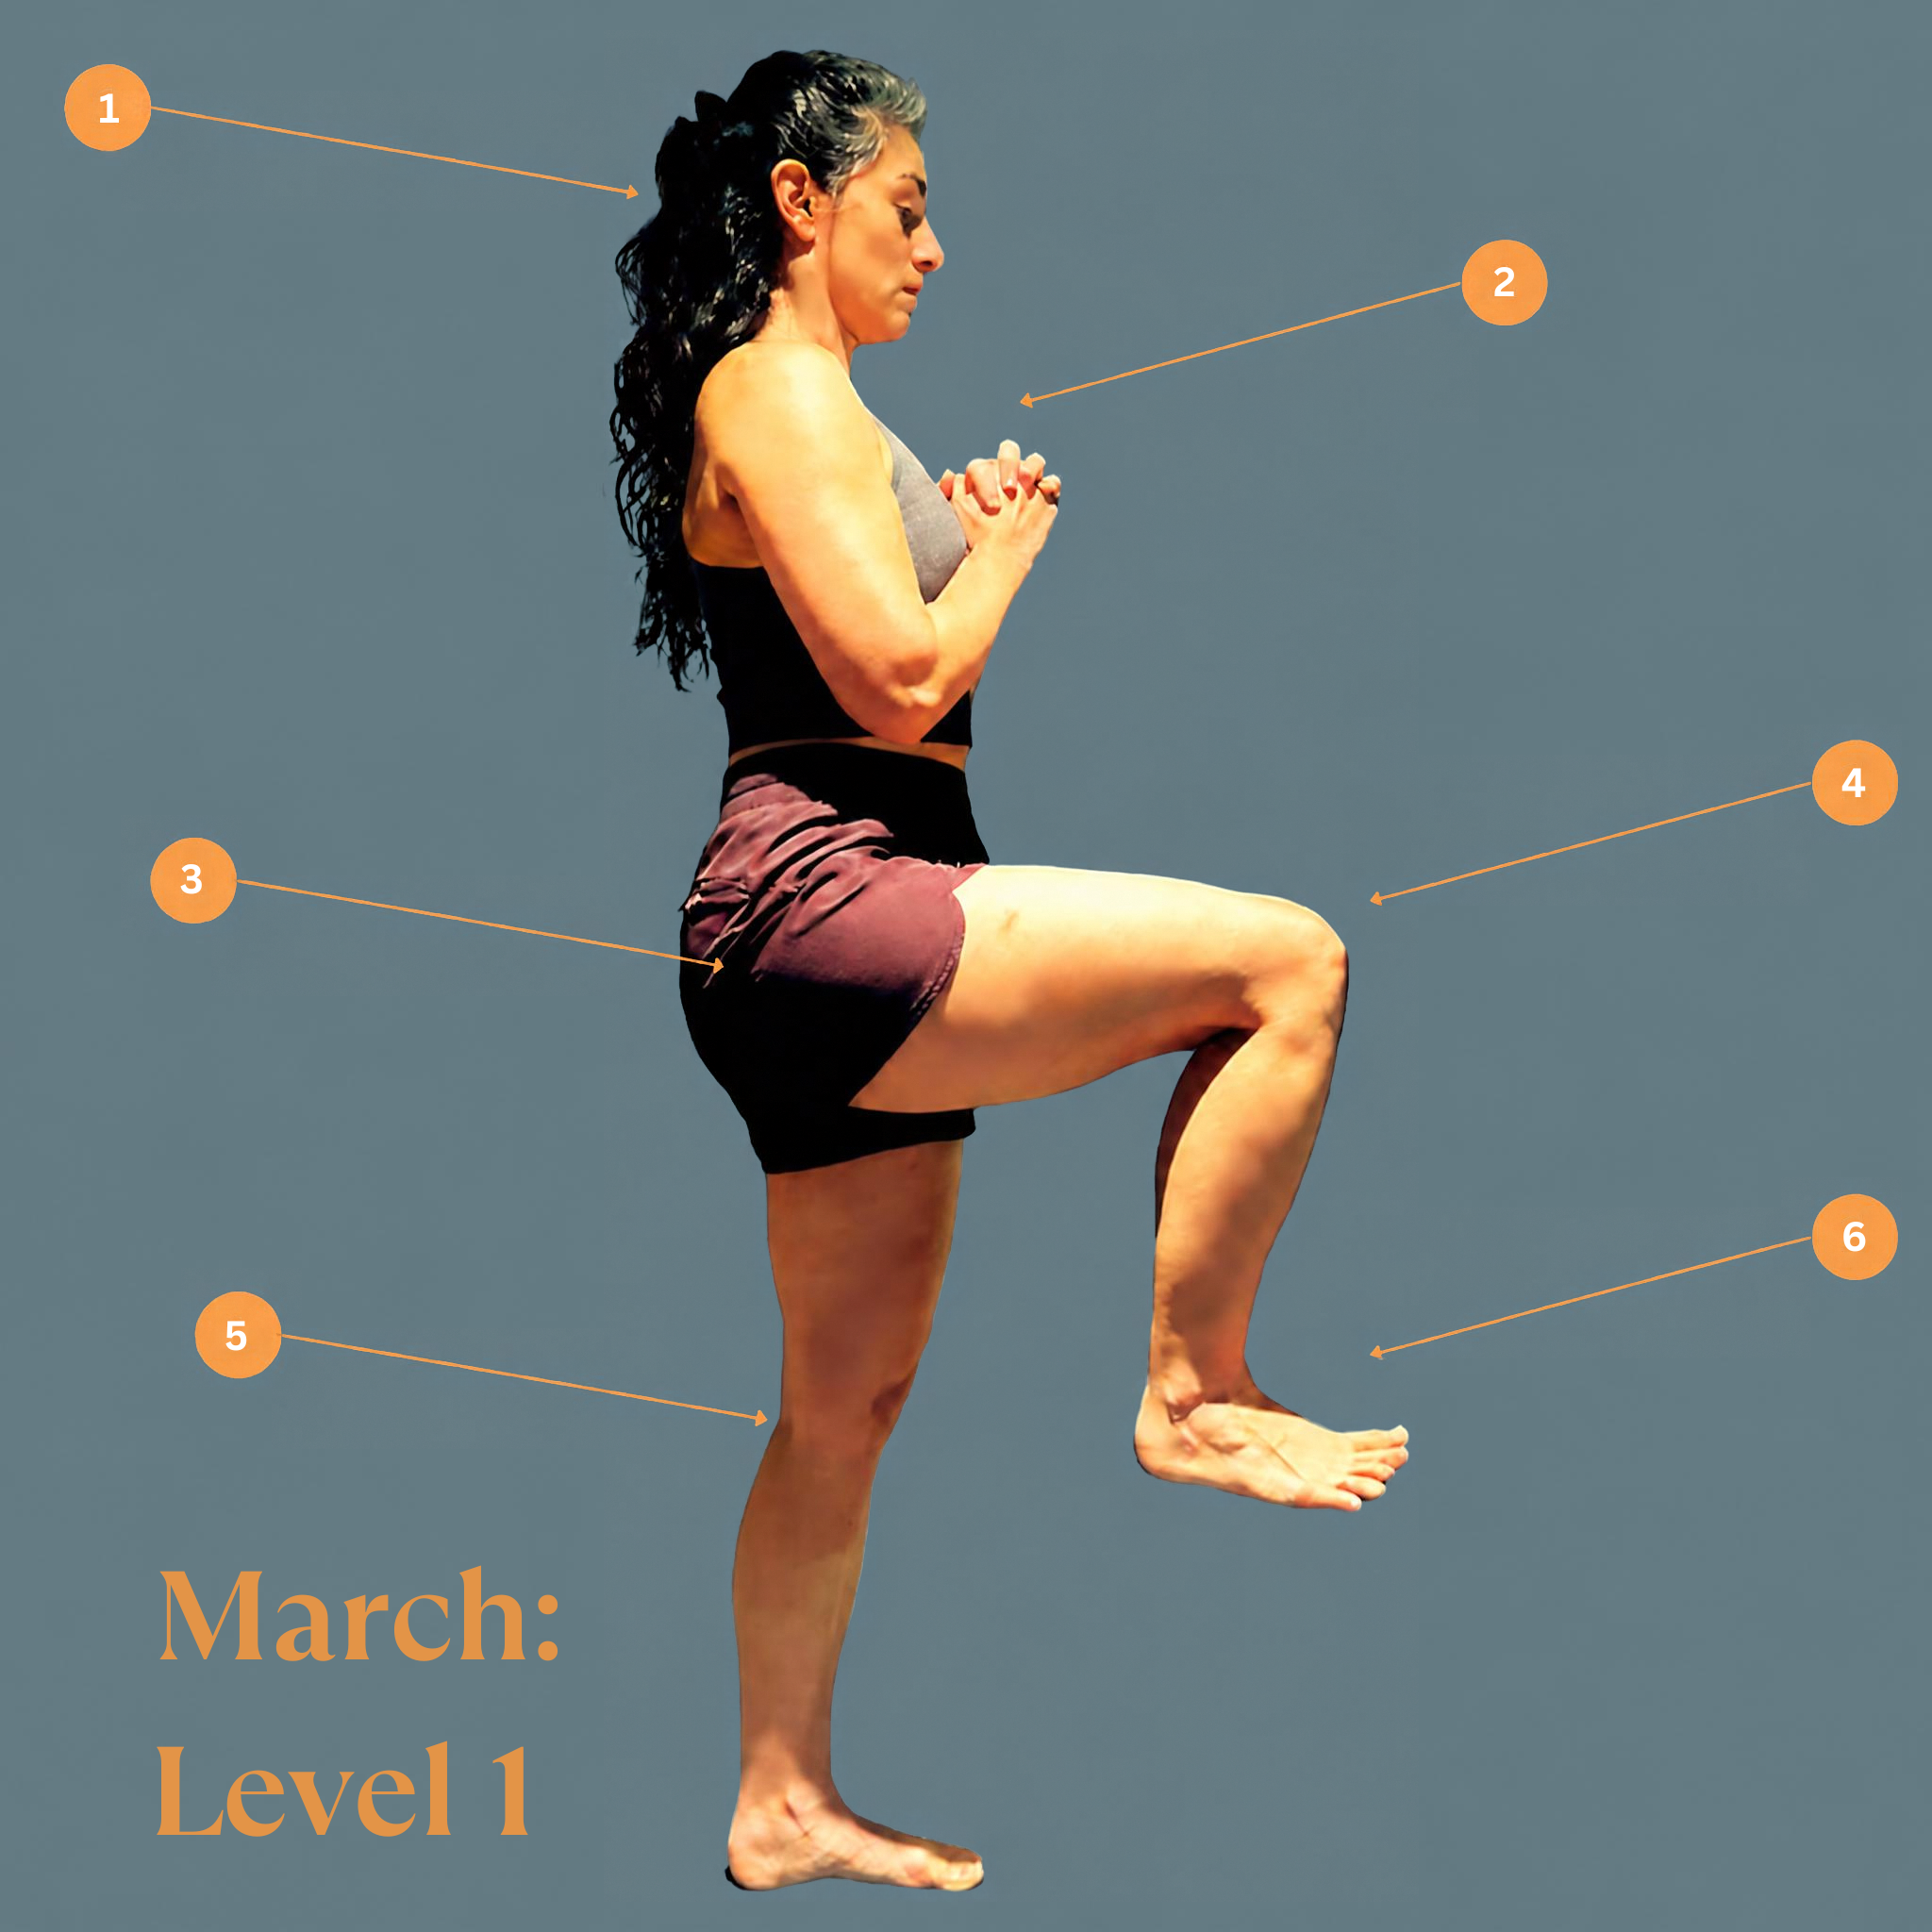
To perform the March (Level 1):
Stand comfortably with the feet below the hips, engaging the core and lengthening the spine. Alternating legs, lift one foot off the ground slowly, bringing the thigh parallel to the floor before lowering slowly down and switching to lift the other leg. Repeat 10 times on each side.
1 - Keep the chin tucked slightly back to align the head over the spine, stacking head, shoulders, hips and feet
2 - Lift the chest to support core engagement and overall posture
3 - When the leg lifts, the hips stay level; avoid hiking the hip up and shortening the waist
4 - The knee of lifted leg stays in line with the hip, creating a 90 degree angle
5 - The standing leg knee has a soft bend, and the standing foot is spread as wide as possible and pressing into the floor
6 - The lifted foot is also active and the ankle is in line with the knee
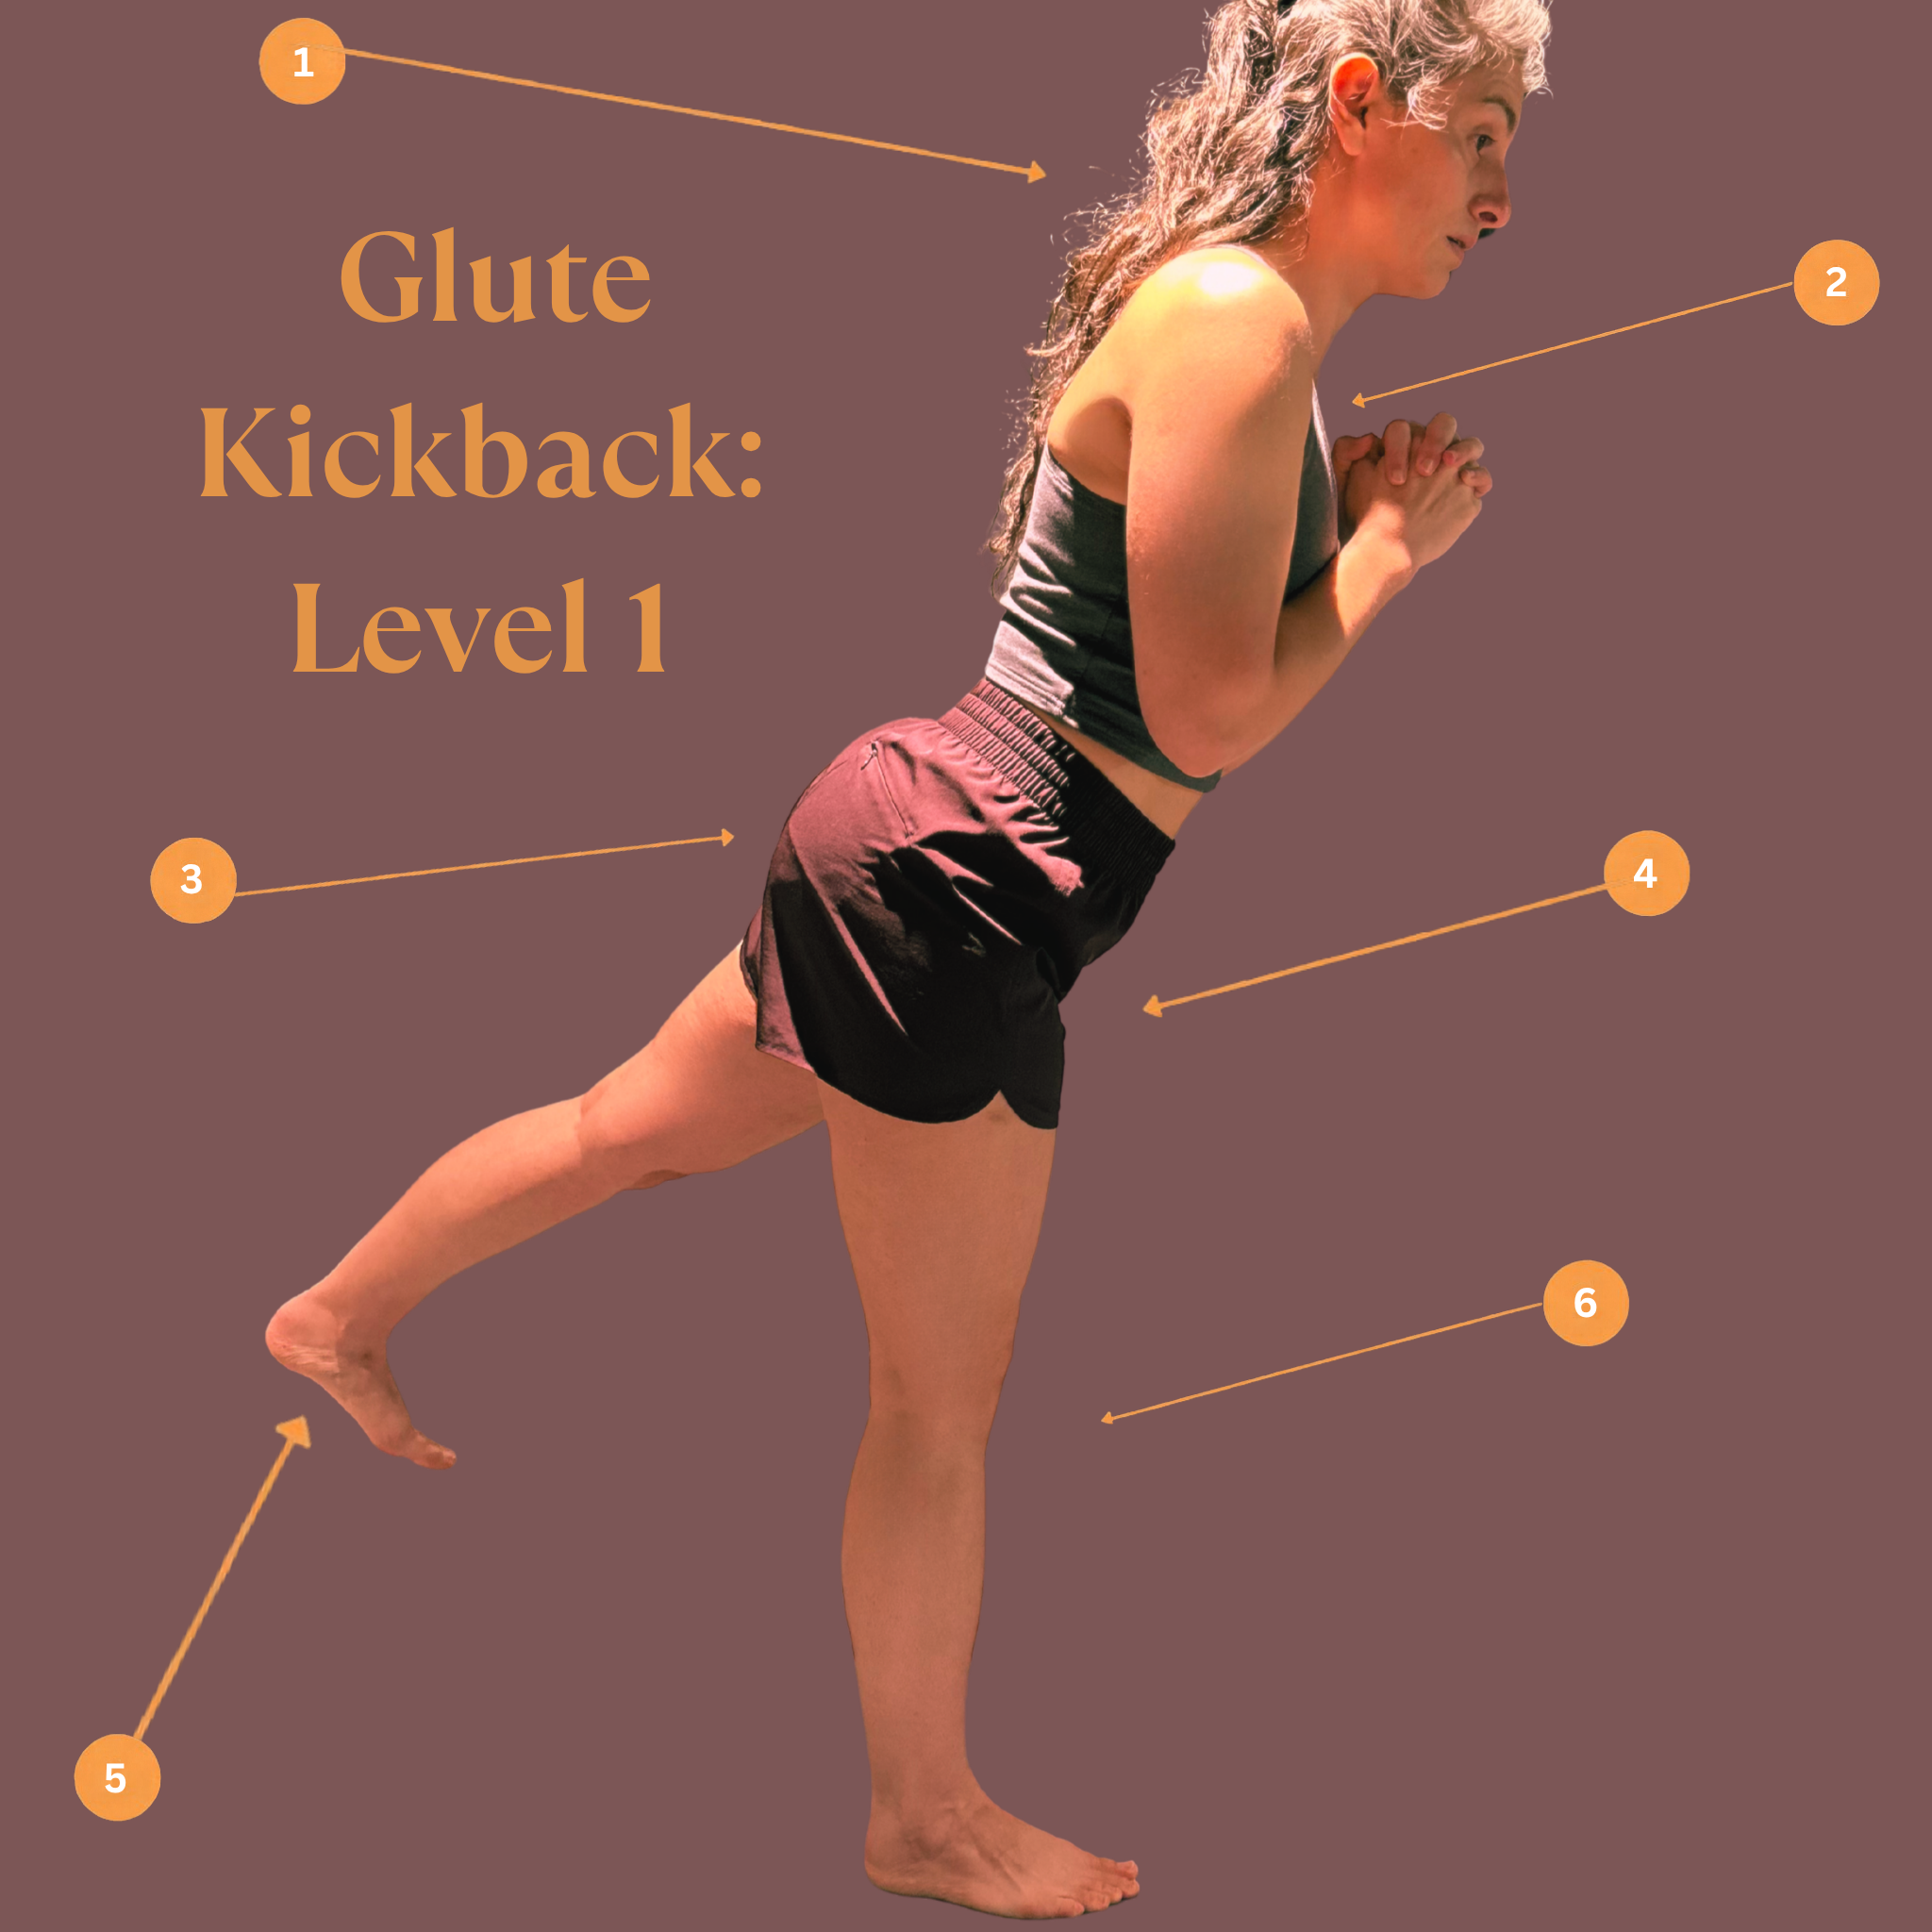
To perform the Glute Kickback (Level 1):
Stand comfortably with the feet below the hips, engaging the core and lengthening the spine. Hinge slightly forward at the hips and slowly lift one foot off the ground behind you at about 45 degrees, keeping that leg straight and the toes pointing down. Bring the foot back to starting position, repeating a total of 10 times then switch sides.
1 - Keep the chin tucked slightly back to align the head over the spine, stacking head, shoulders, hips and feet
2 - Even with a hinge in the hip, lift the chest to support core engagement and overall posture
3 - The back of the hip squeeze powerfully to lift the foot and leg away from the floor
4 - There is a slight hinge in the hips
5 - The lifted foot is active and the toes are pointing down toward the floor
6 - The standing leg knee has a soft bend, and the standing foot is spread as wide as possible and pressing into the floor
Before increasing difficulty, try linking the two movements in sequence to mimic walking: left glute kickback, left march, right glute kickback, right march.
To make the movements more challenging, add a resistance band, increasing band level as the movements become easy. Finally, add a dumbbell in a goblet hold at the chest.
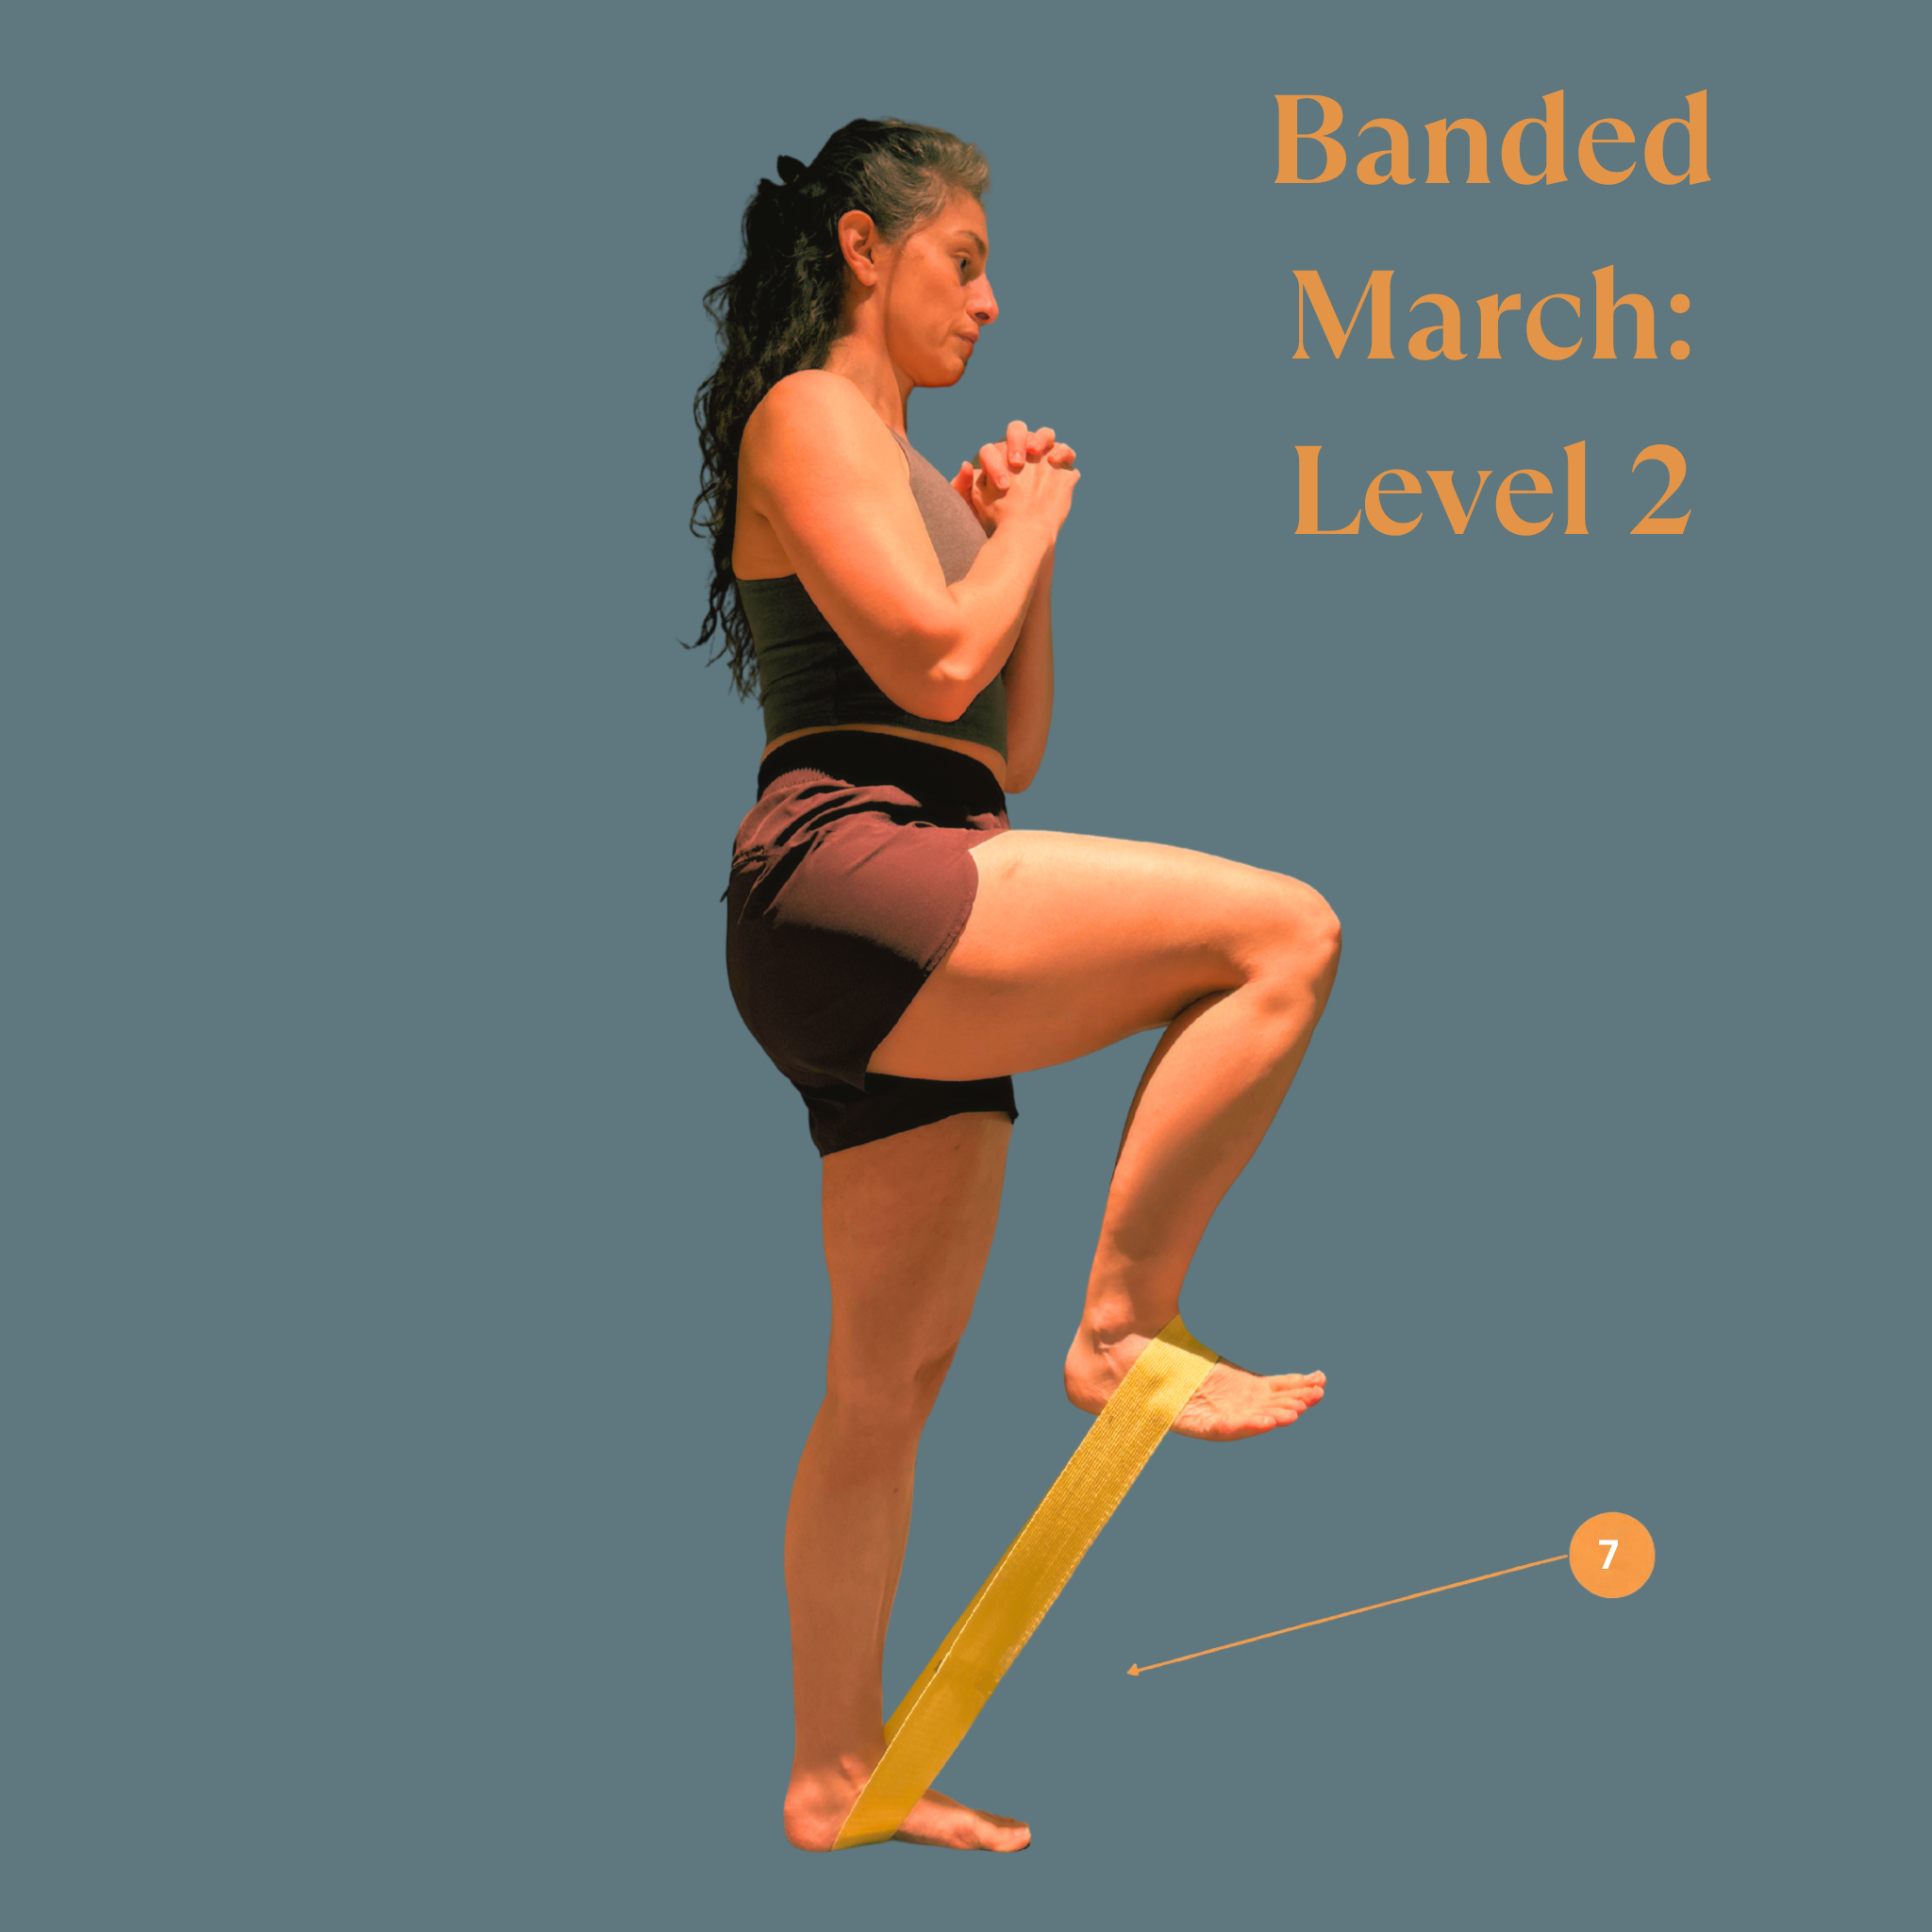
To perform the March with a Band (Level 2):
Follow the instructions for Level 1. Increase band weight as the movement gets easier.
7 - Place the band across the arch of each foot, the band should be in full tension at the top of the movement
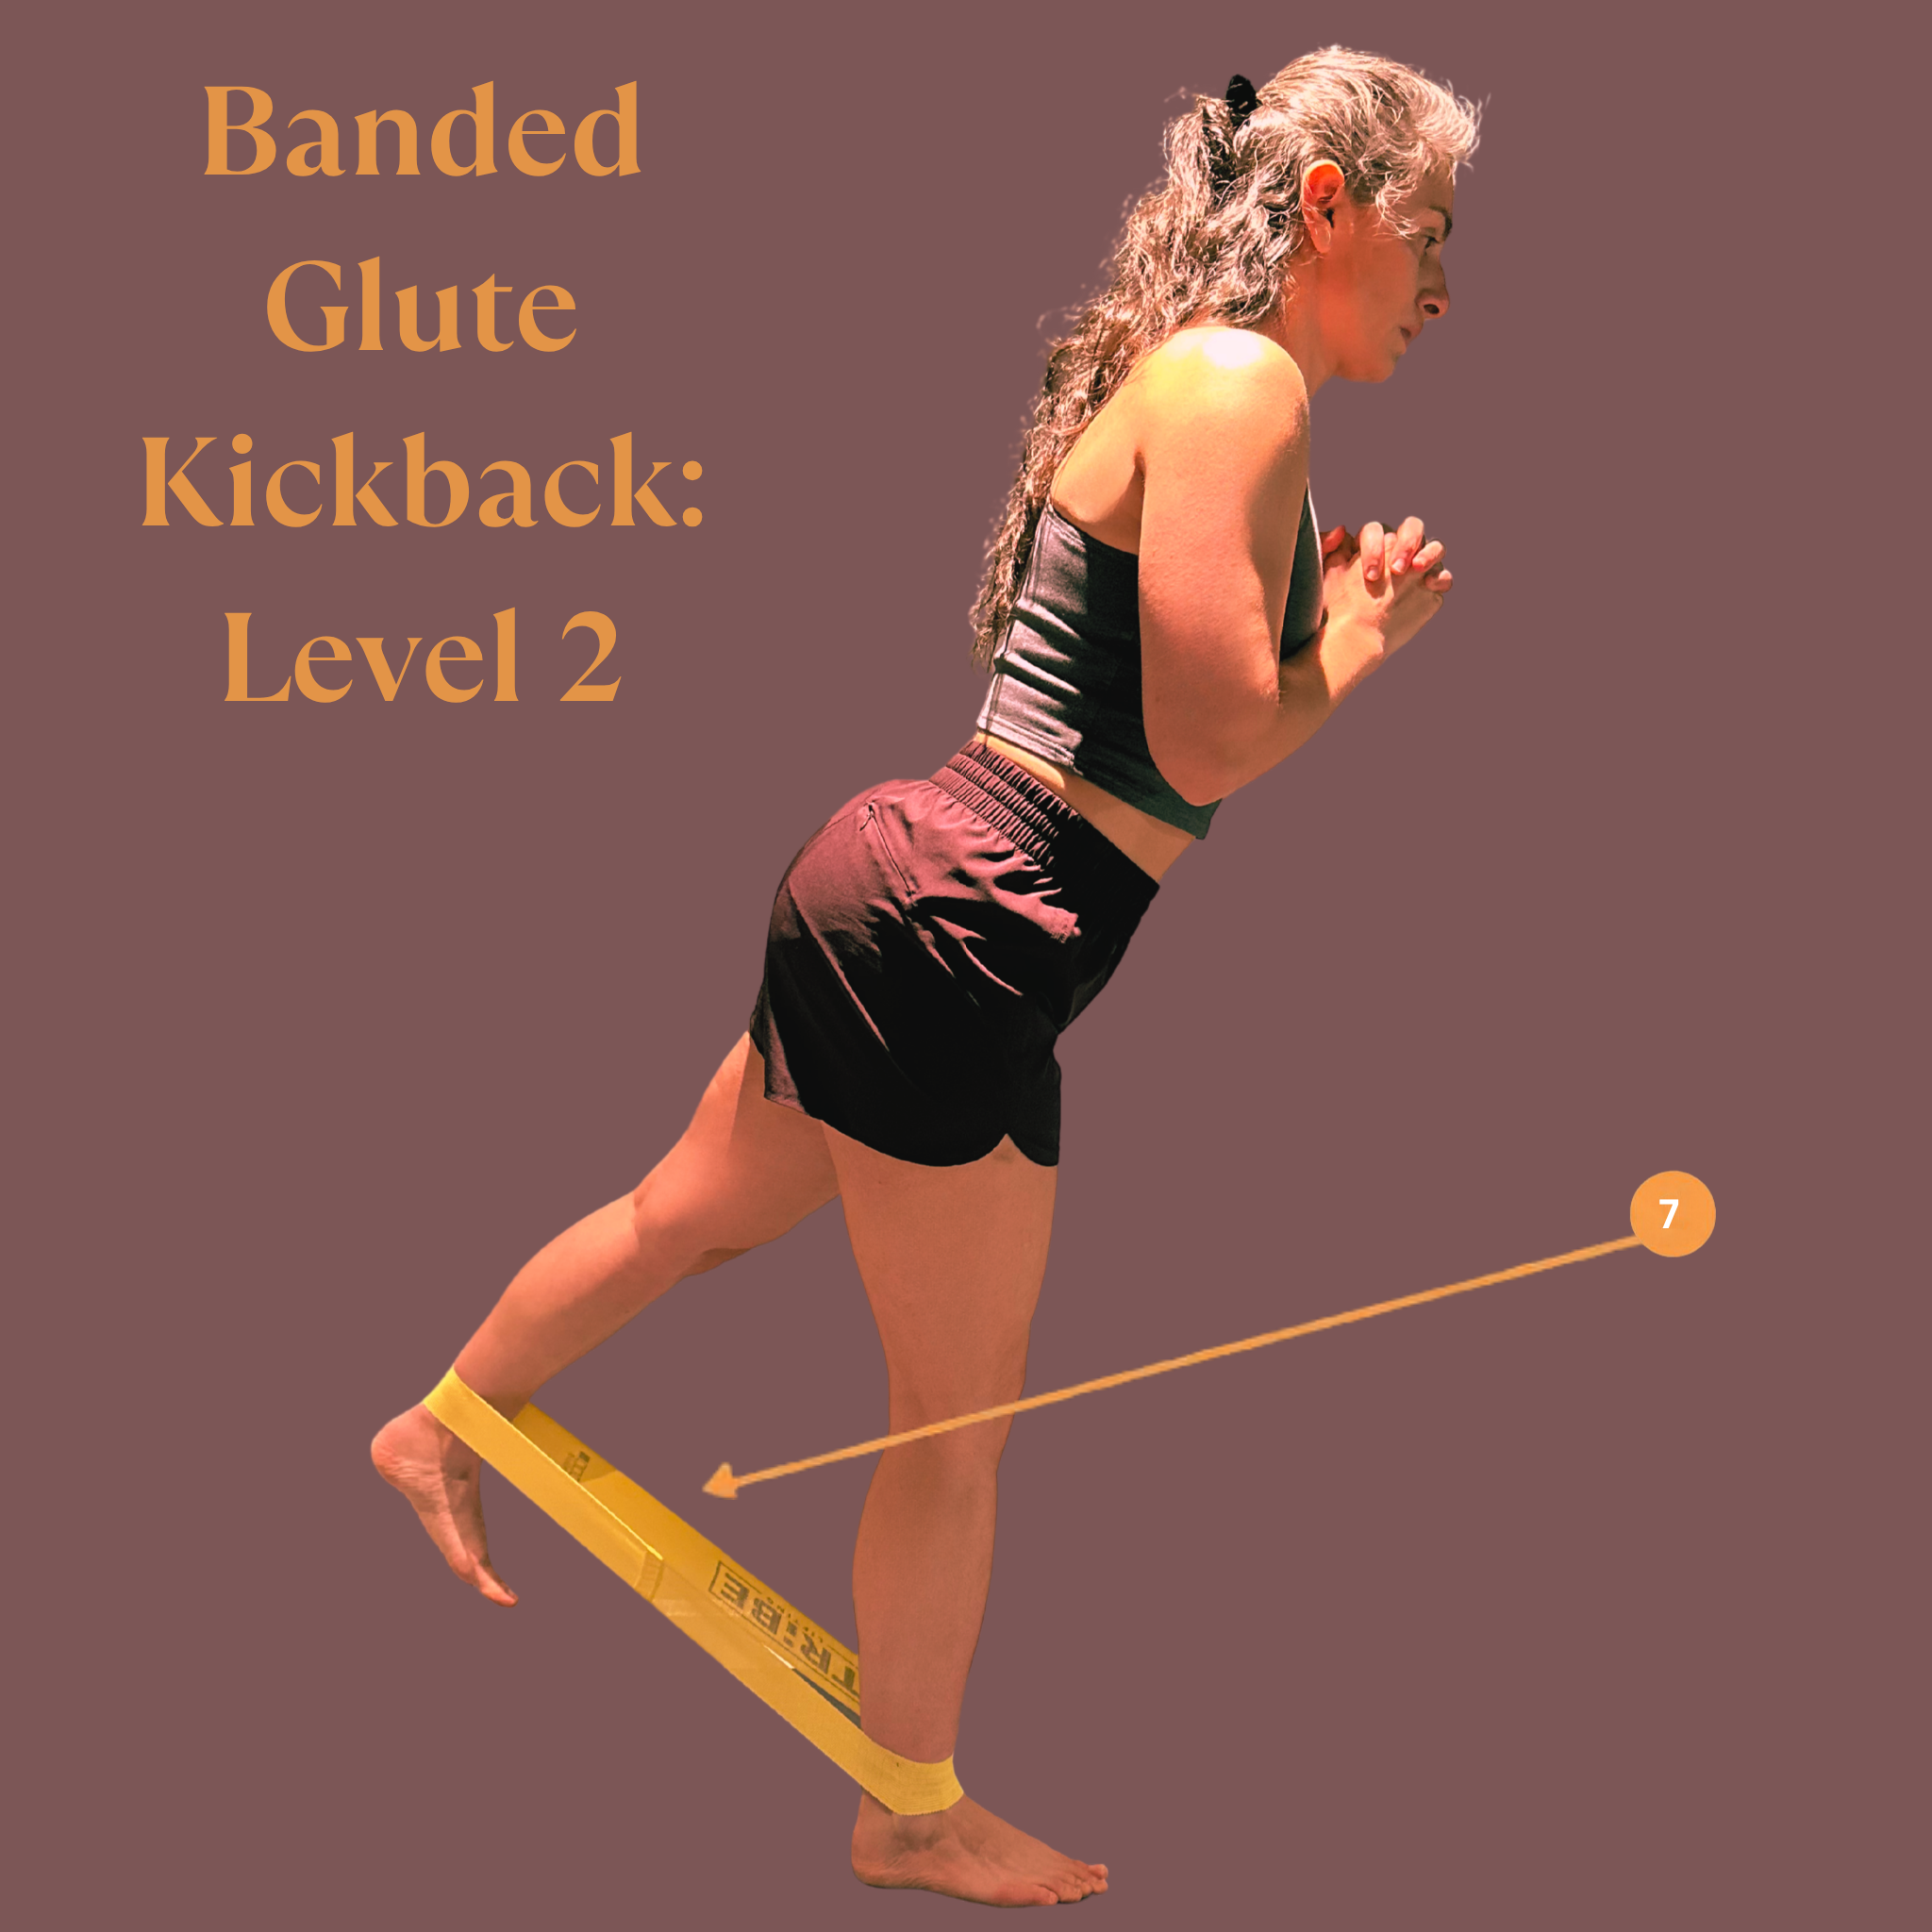
To perform the Glute Kickback (Level 2):
Follow the instructions for Level 1. Increase band weight as the movement gets easier.
7 - Place the band around the ankle each foot, the band should be in full tension at the top of the movement
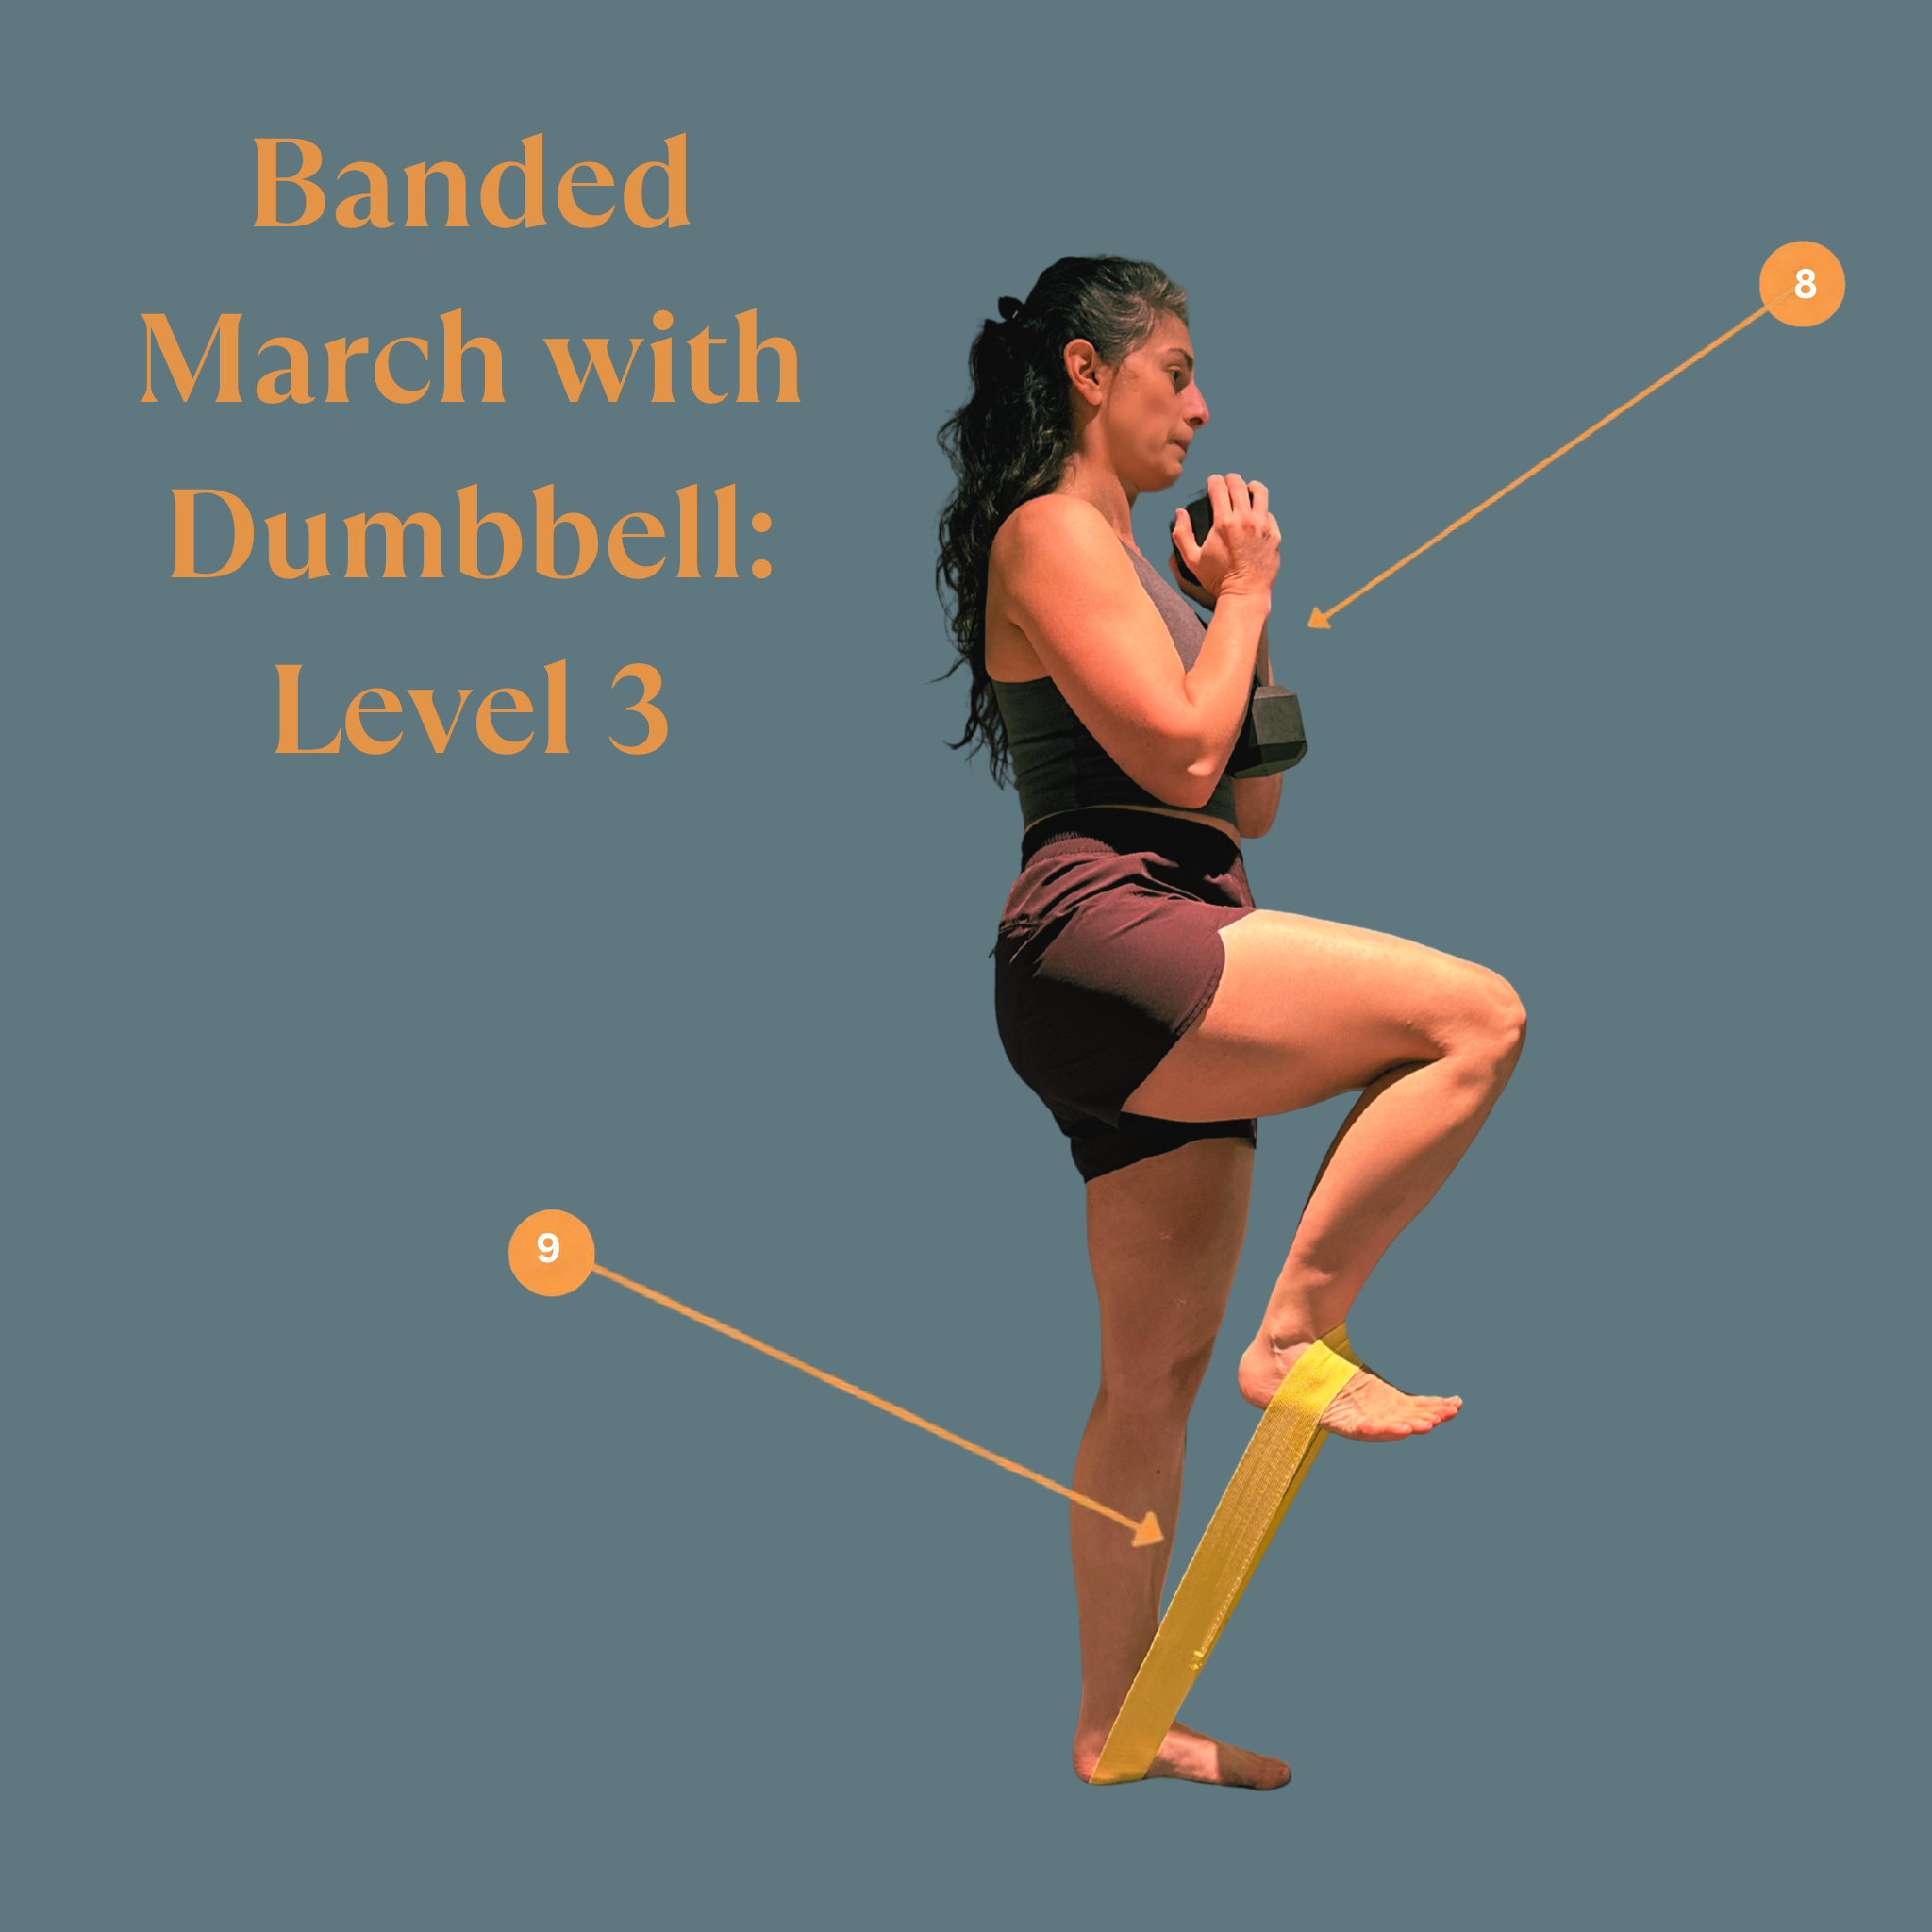
To perform the March with a Band and Dumbbell (Level 3):
Follow the instructions for Level 1 and Level 2. Increase dumbbell weight as the movement gets easier.
8 - Cup one end of a dumbbell between both hands and hold against the chest with elbows squeezing close the the waist
9 - Place the band across the arch of each foot, the band should be in full tension at the top of the movement, hold for a moment at top before slowly lowering, keeping band tension as long as possible
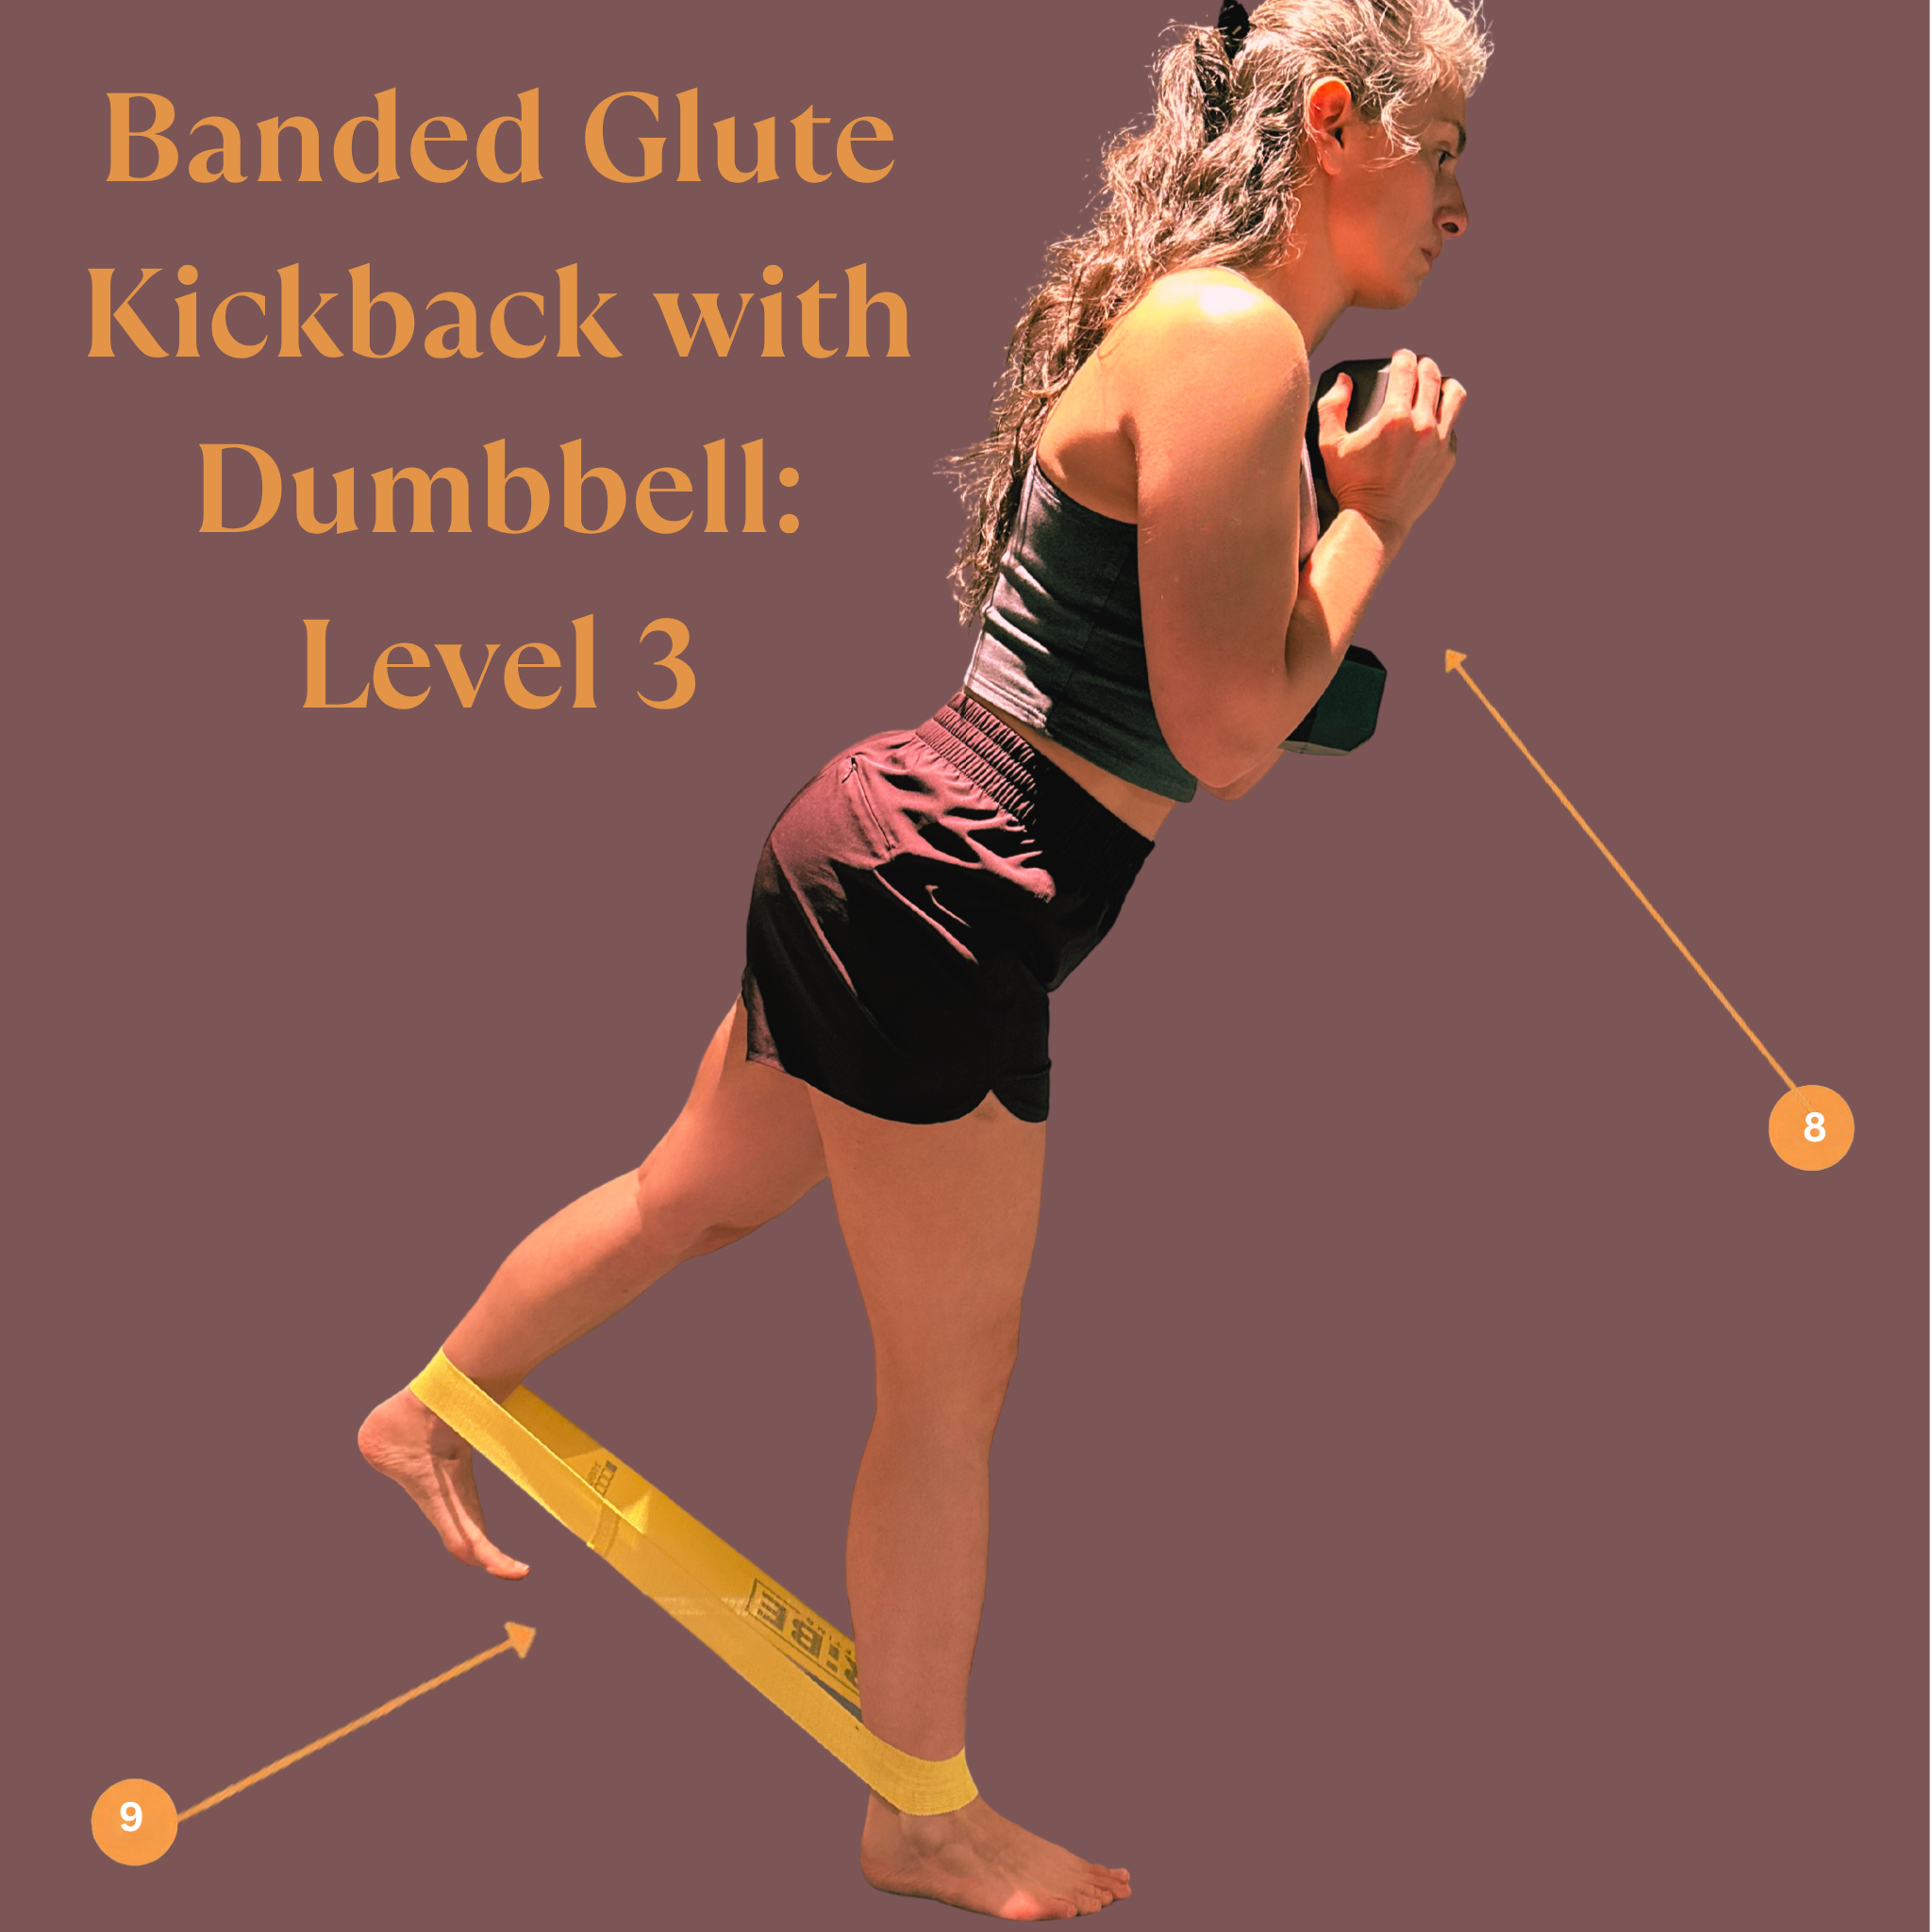
To perform the Glute Kickback and Dumbbell (Level 3):
Follow the instructions for Level 1 and Level 2. Increase dumbbell weight as the movement gets easier.
8 - Cup one end of a dumbbell between both hands and hold against the chest with elbows squeezing close the the waist
9 - Place the band around the ankle each foot, the band should be in full tension at the top of the movement, hold for a moment at top before slowly lowering, keeping band tension as long as possible
Again, practice linking the movements after completing a set of 10 on each side. Ideally, practice two to 3 sets of 10 on each side for a complete workout.